Introduction
In response to the Covid pandemic, our general meetings have been held using Zoom. We want to post the videos of our Zoom meetings
1) For SAC members to refer back to, and
2) For outside people to view if they are interested in our speakers.
I have implemented a YouTube Channel for the club which will host these videos in a location where everyone (SAC and outside people) can hopefully find them. This requires someone to upload each meeting’s video to the YouTube Channel. This post describes the steps for doing this.
Uploading a Video
1) Go to the YouTube Channel
On the SAC web site, click the menu item Events/Zoom General Meeting Archive
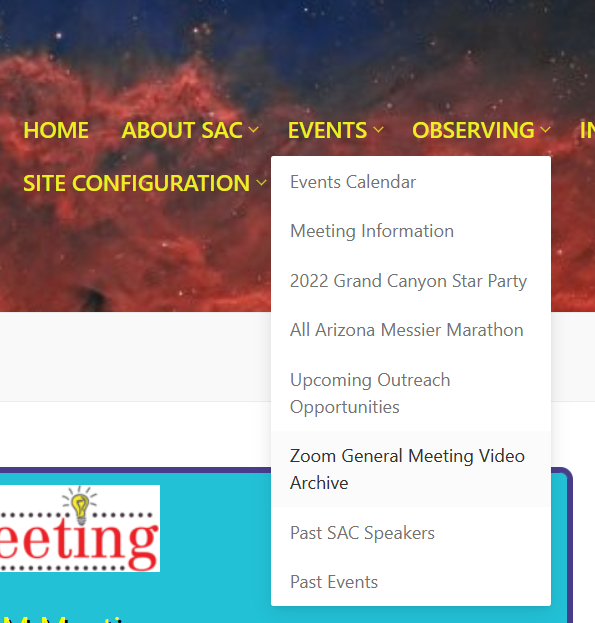
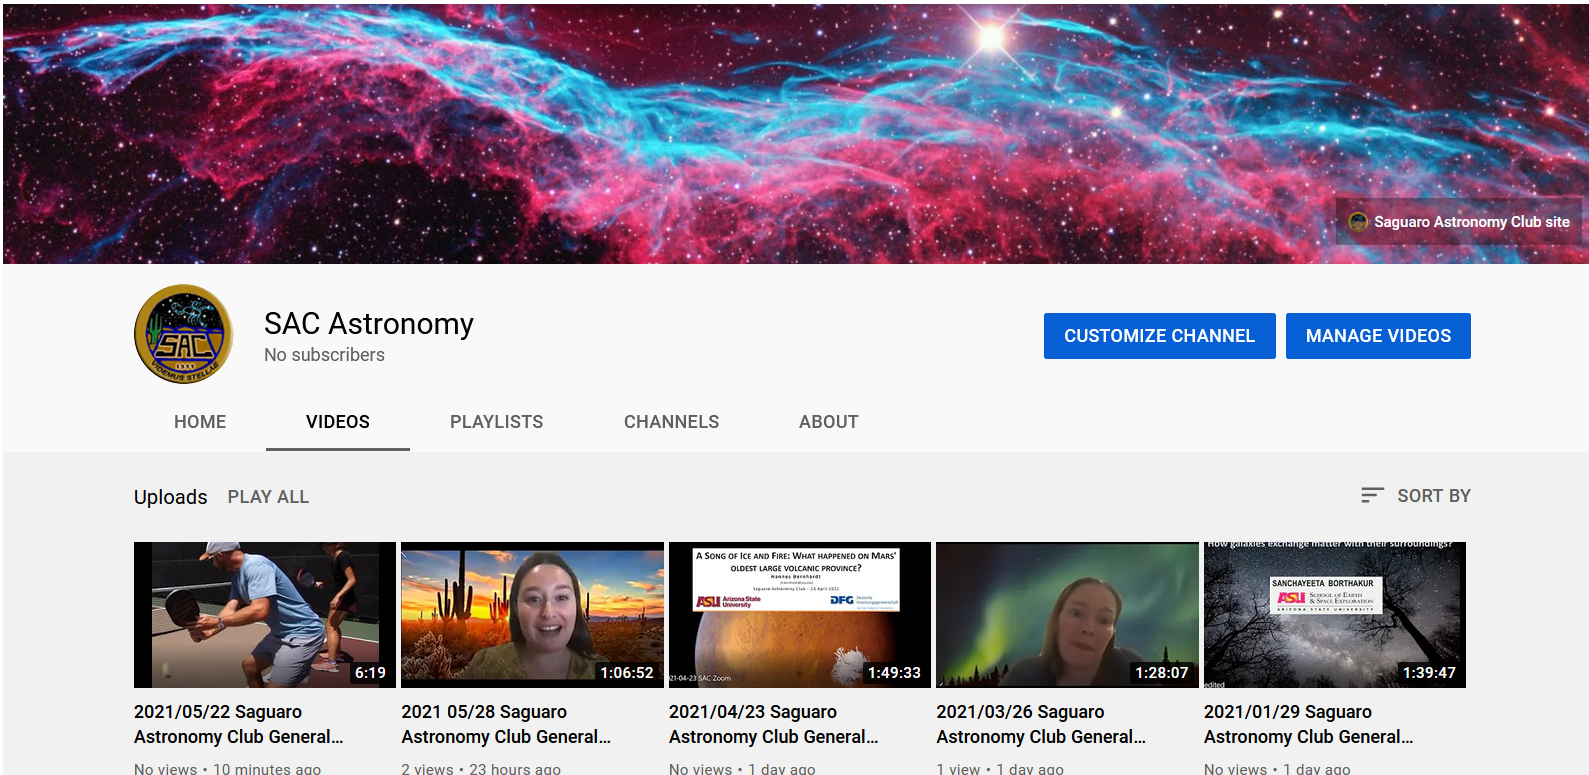
This takes you to the SACastronomy YouTube Channel, showing our videos.
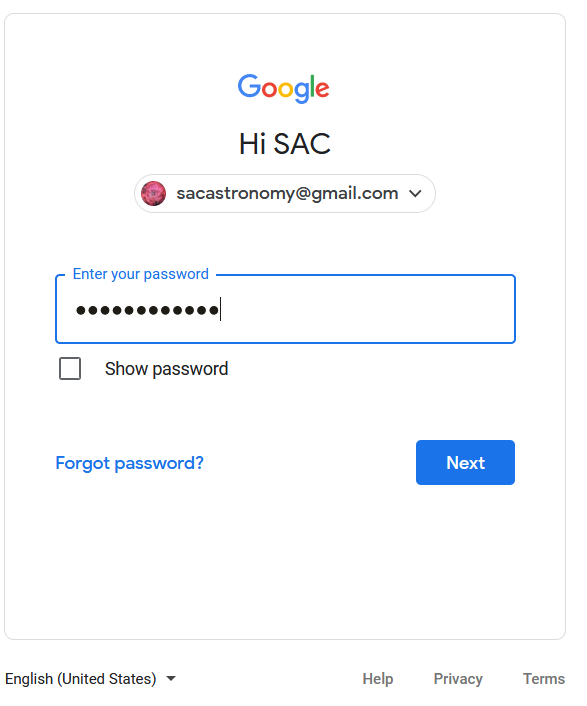
2) Log In as the Channel Administrator
In the upper right corner of the screen you need to sign into the YouTube Channel as the owner of the channel, to allow editing of the videos.
The structure of the YouTube channel uses
a) a Google account, which has been created as SACastronomy@gmail.com. The password for this account is M31Andromeda.
b) The Google account can have multiple YouTube Channels. I have created a single Channel. Potentially we could have several channels; perhaps one for mirror grinding techniques, another for Astrophotography lessons, and so on.
Using the Sign In button at the top right of the screen, select the Google account sacastronomy@gmail.com and enter the password.
You then return to the Channel screen:
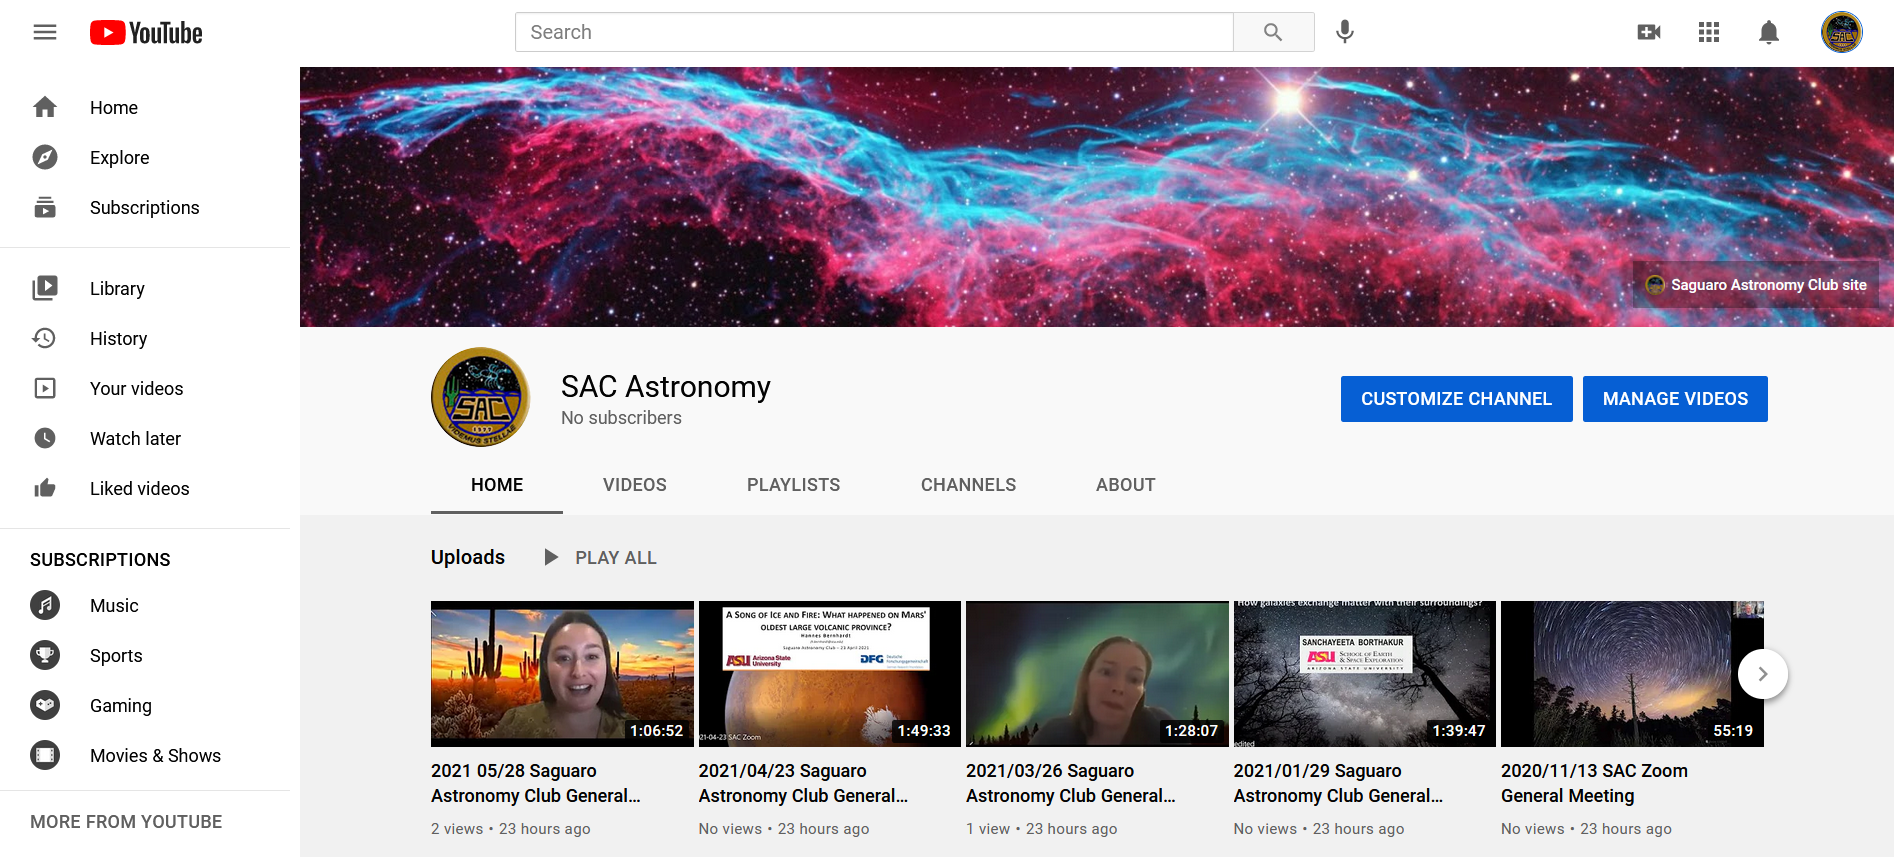
Notice the SAC logo in the upper right, indicating you are now signed in. There are also two blue buttons, “Customize Channel” and “Manage Videos”.
Customize Channel – allows you to change settings for this overall channel.
Manage Videos – Allows uploading and editing of the videos for this channel.
3) Upload the Video
a) Gathering Information
Before you upload the video, you should collect some information you will need. If you don’t have it ready ahead of time you can add it later, but it is easiest to get it first.
Date of the Meeting
This is generally in the video filename.
Speaker Information
Speaker Name, Affiliation, Topic. You can usually find this in the video.
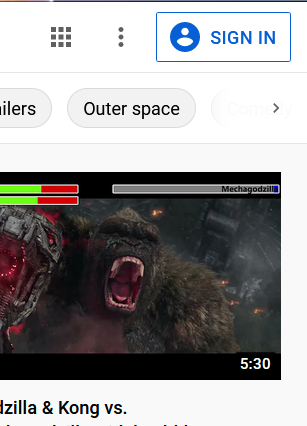
Thumbnail Image
When the video gets uploaded the YouTube system will generate a default thumbnail from the video frames. I have not found this to work well. You want to generate your own image. My random approach is
1) Open the video file from Windows File Manager, using something like the “Movies & TV” app. Stop the video from playing. Make sure the window is NOT maximized (or else the Snip Tool will not work).
2) Move through the video to find a shot with an appropriate image: perhaps an image of the speaker, or a dramatic image related to their topic.
3) Bring up Snip Tool and take an image of the desired portion of the screen.
4) Save the image on your hard drive as something like 2021-05-22Thumb.PNG (assuming the Video is for 2021-05-22).
You may come up with a better system; this is a little kludgy.
b) Uploading Video
You are now ready to upload the video from your hard disk.
At the upper right of the Channel screen click Manage Videos. This opens a new page for YouTube Studio, used for uploading and editing your videos.
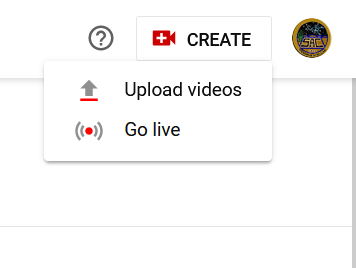
At the upper right, click the Create menu button and select Upload Videos.
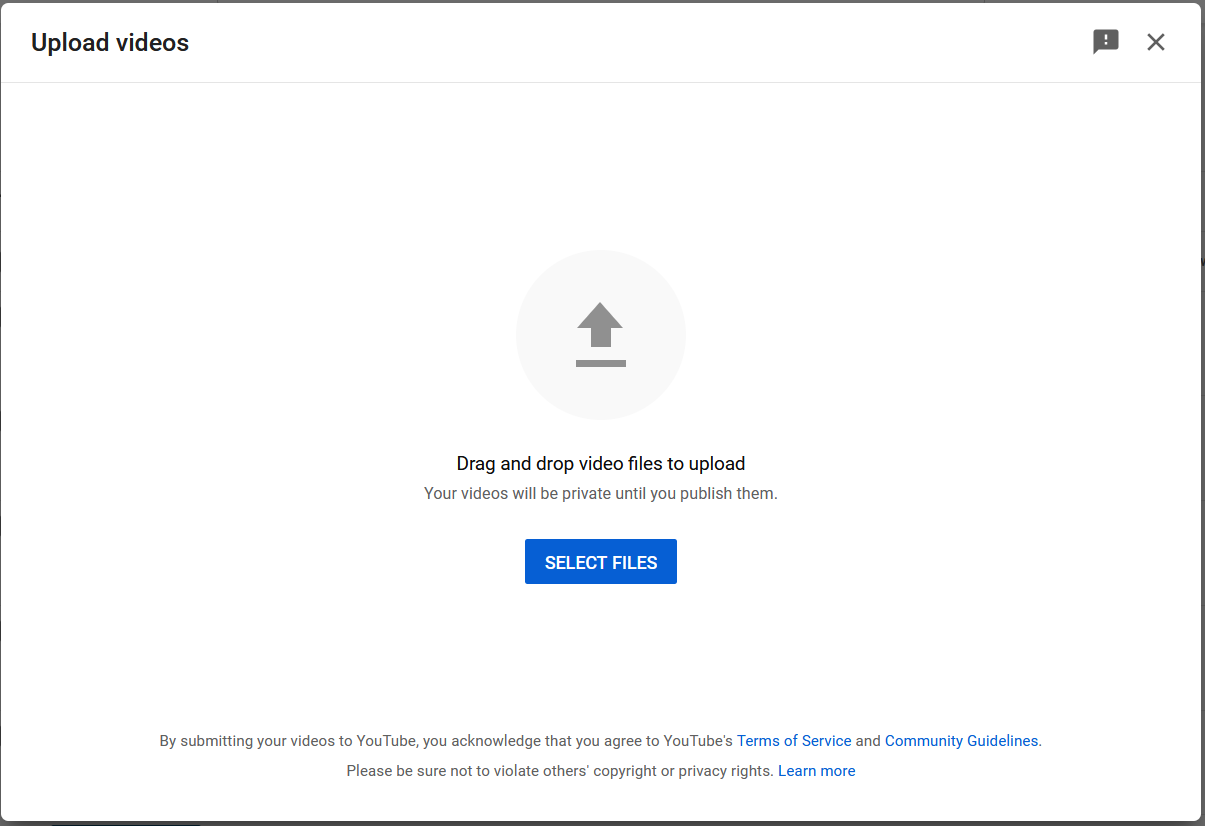
This brings up a dialog screen allowing you to either drag a video file from the Windows File Manager to the Drop zone, or click Select Files to select your file. The second option allows multiple files to be transferred at once.
The system will hum for a few seconds, then begin a series of forms to collect information about the video.
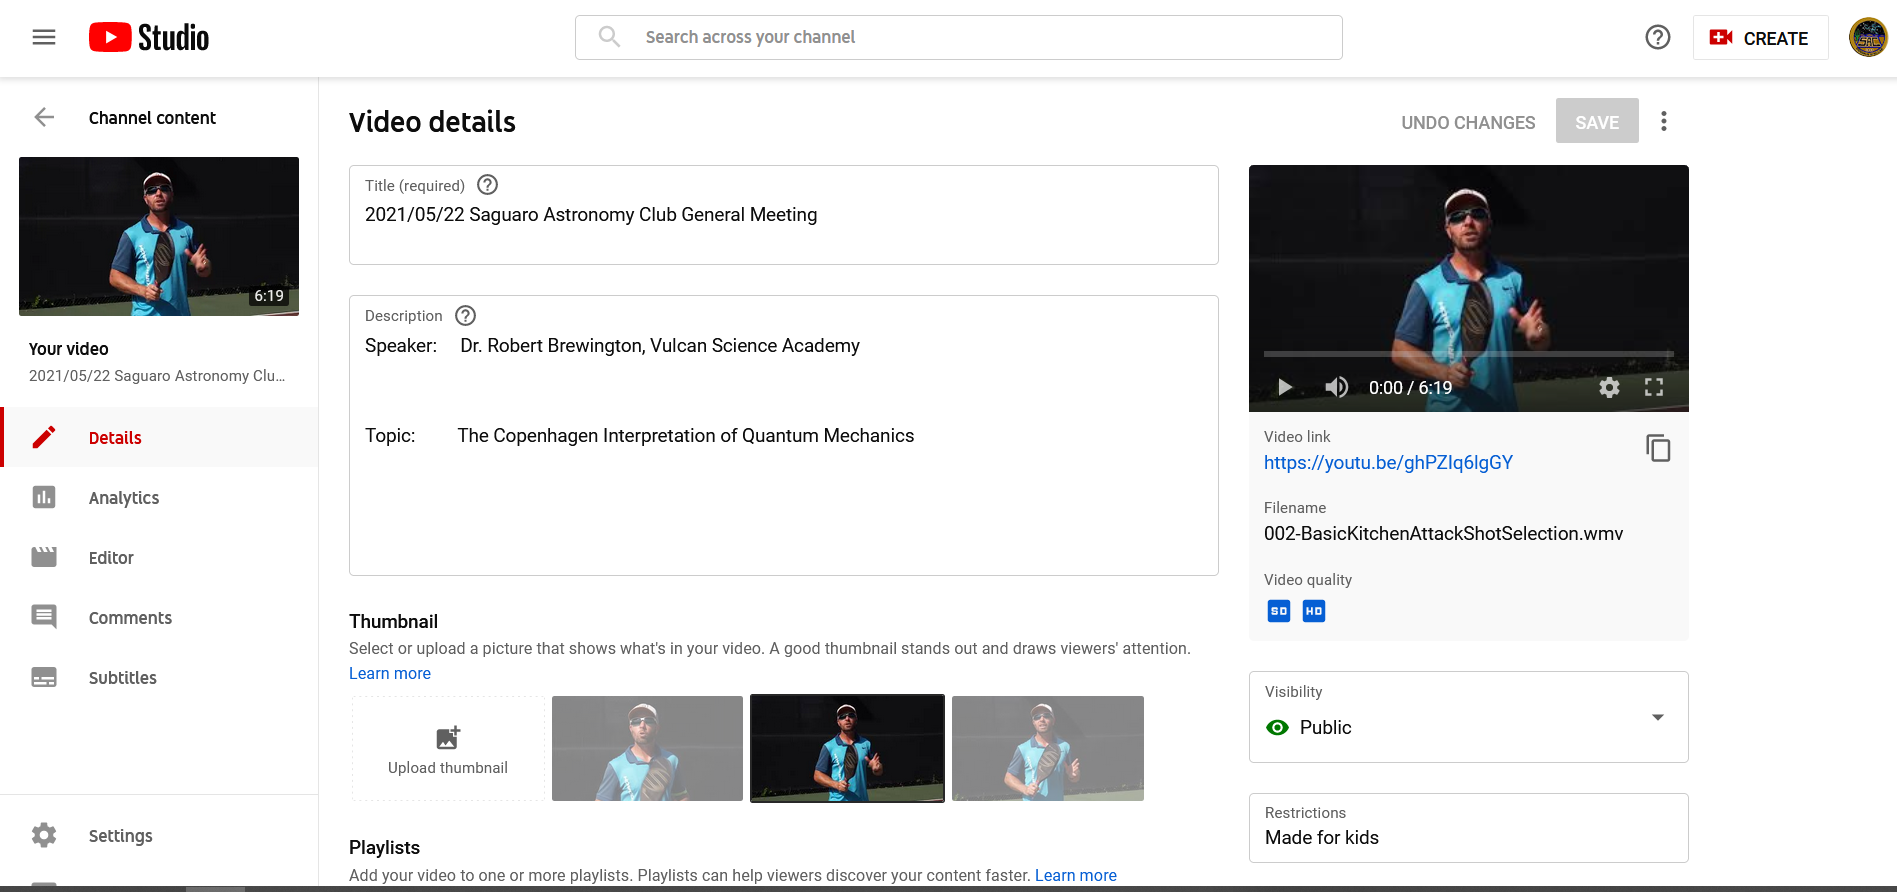
c) Fill out video information
The next few screens collect information for the video.
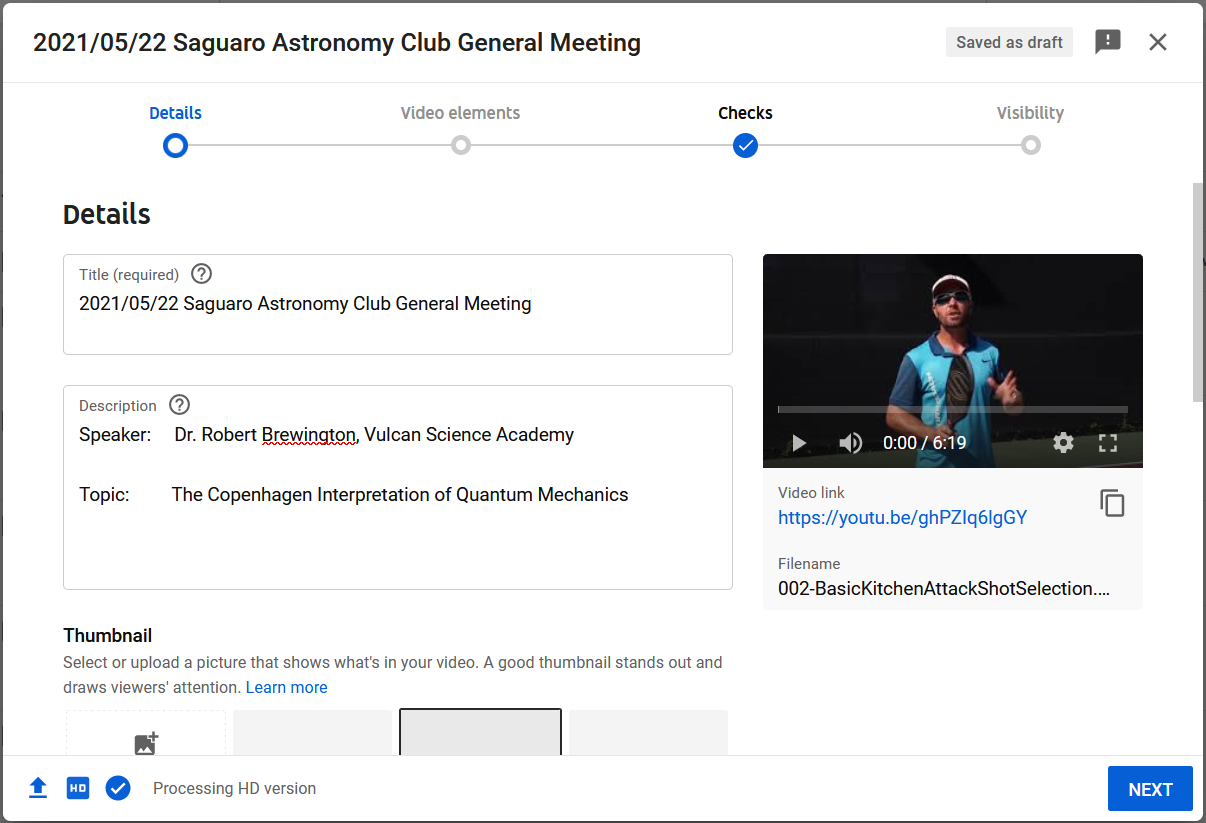
This screen collects the title and description. I have shown the format I use in adding the title with the date first. Use Saguaro Astronomy Club rather than SAC, because this may be discovered by someone outside the club.
Normally you would upload the thumbnail you previously prepared. For this example we will let the system generate its own, then fix it later.
Click Next when the information is correct.
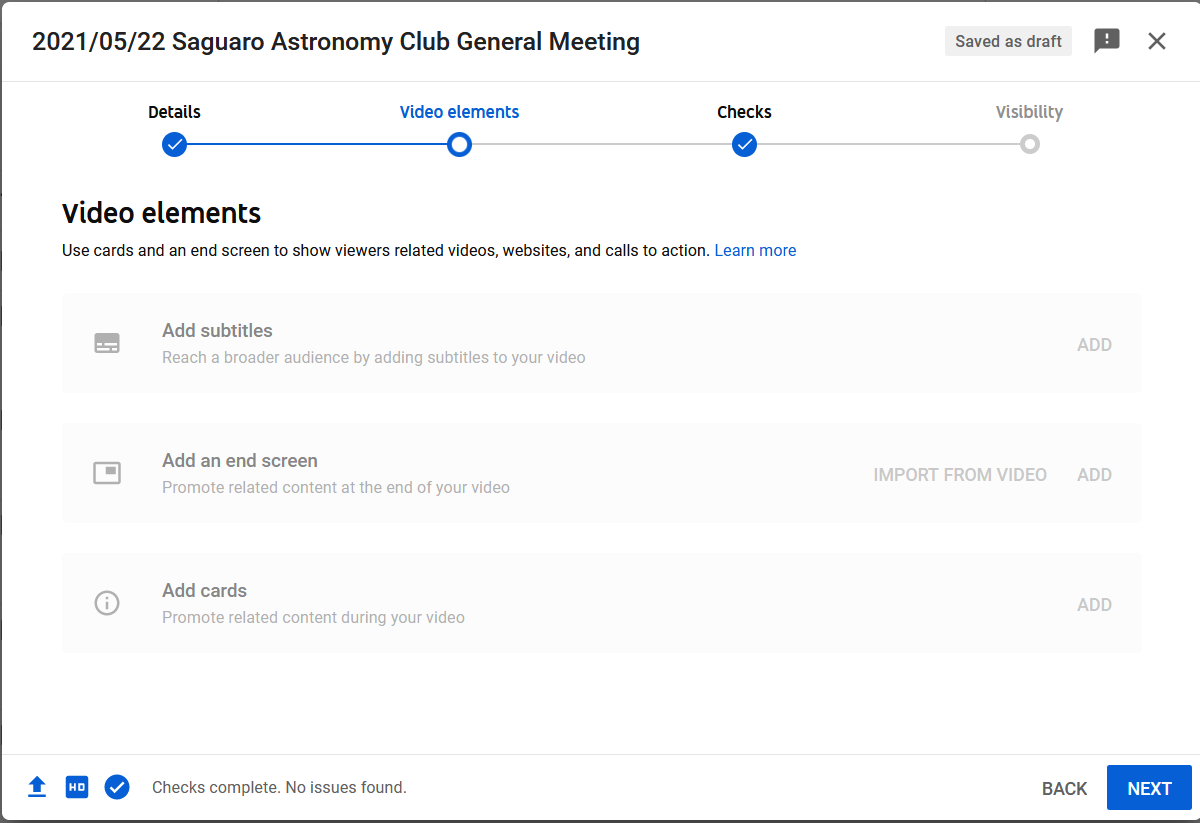
It is possible to add cutesy stuff to the video; I don’t think we need any of this. Click Next.
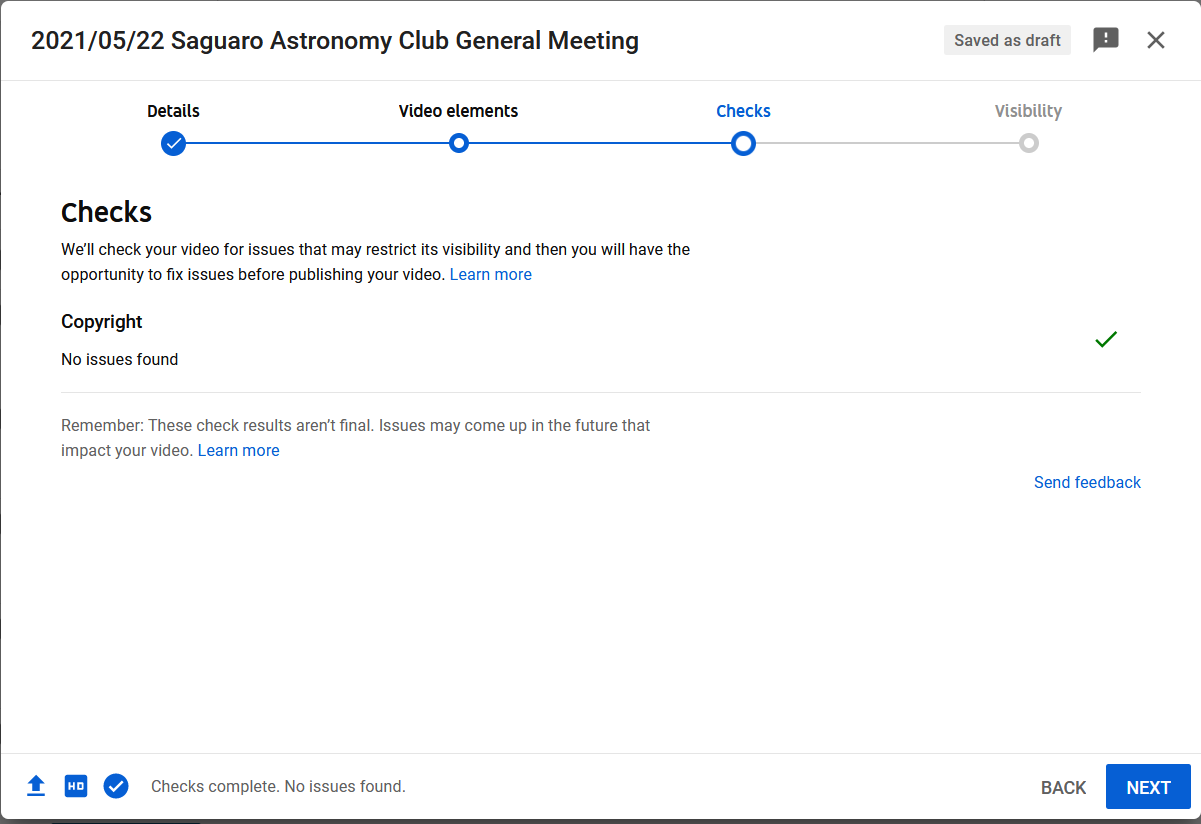
The YouTube runs some checks – I do not think we should run into anything here. Click Next.
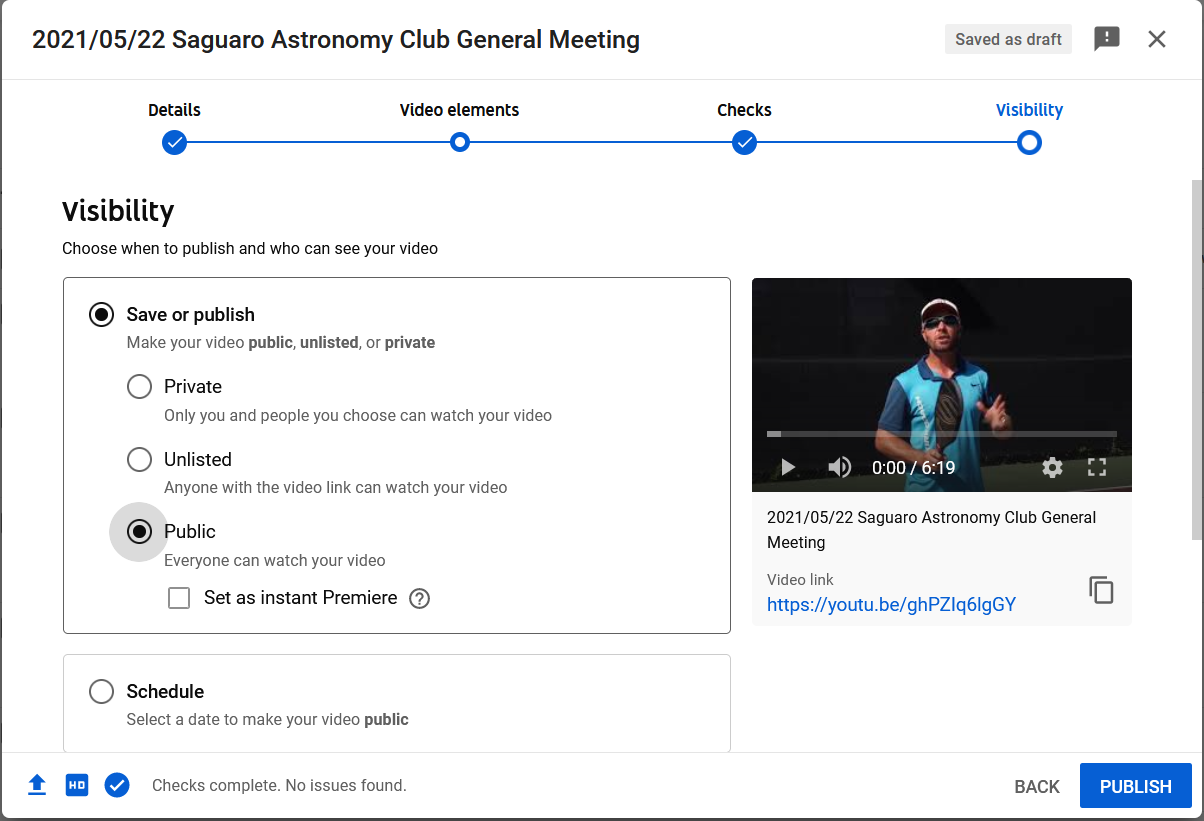
Select Public posting so people can see the video. The Schedule option lets you have the video published on a particular date in the future. I don’t think we have any need for this.
Click Publish when everything is set. You can go back to the previous screens if you forget something, then click Publish.
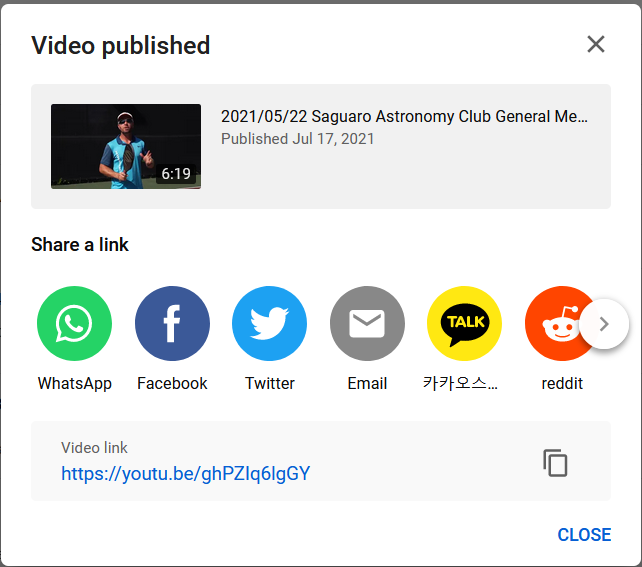
This shows that your video has been published. It shows the default thumbnail image since we did not give it one (just for this example!).
Click Close.
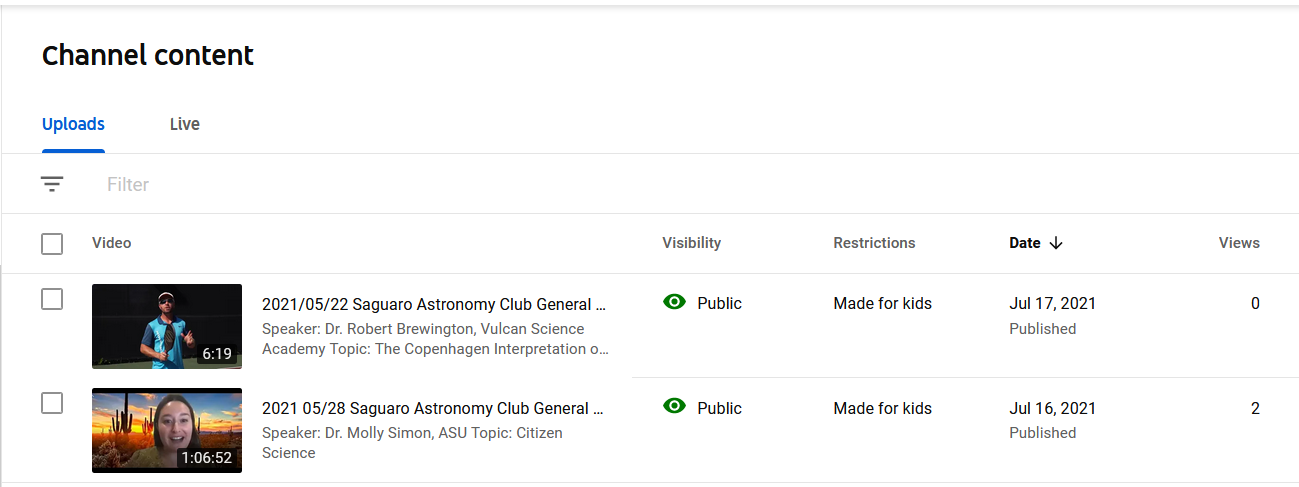
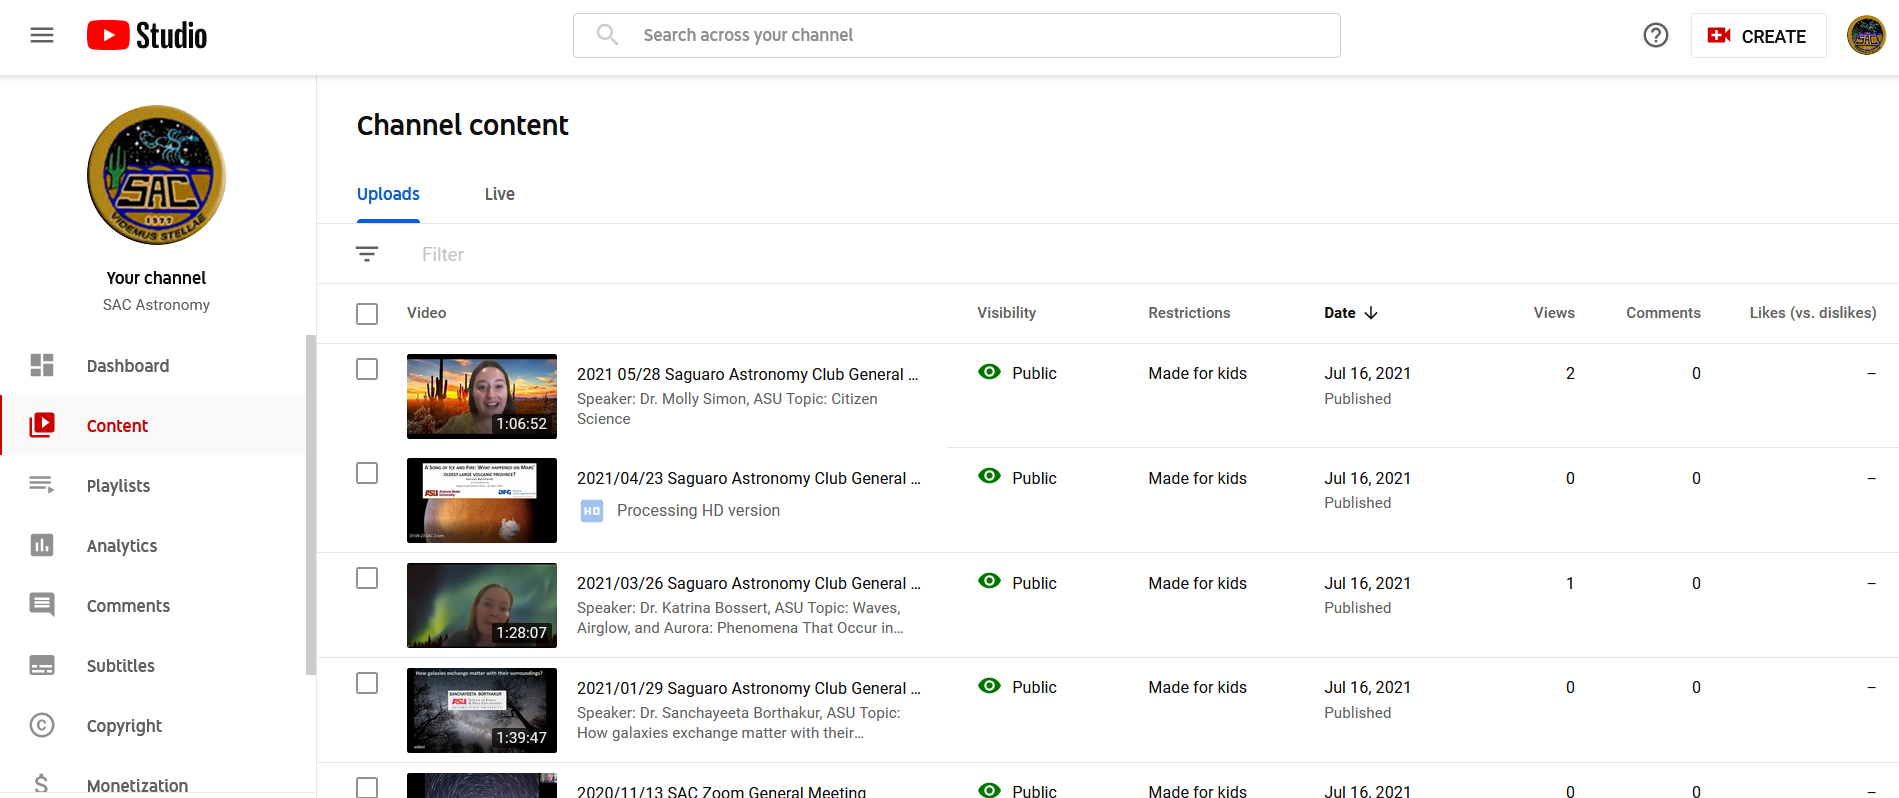
Your Channel Content screen now shows your video.
Note – when videos are uploaded the YouTube system spends some time converting/processing the video. For example, it converts the video into an HD version, and perhaps other versions. It may be awhile before the video is fully ready.
Editing a Video
You may wish to change the information for a video, such as the speaker name or topic or to replace the thumbnail image. In this example I will replace the thumbnail.
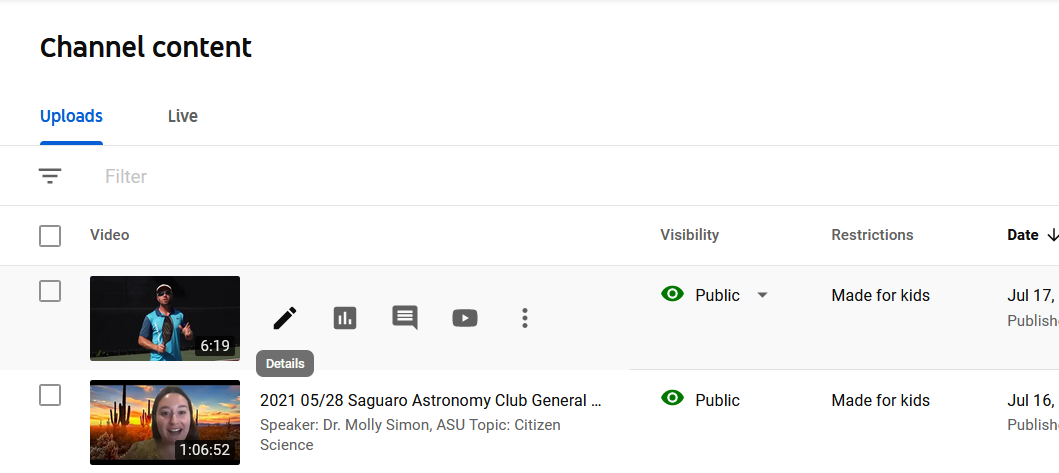
In the Channel Content screen above, hover your cursor over the video to be changed. Note that the description area is replaced with some icons as shown below. We want to click the pen (edit) icon.
This screen allows changing information previously collected when the video was uploaded. In this example we want to upload a better thumbnail for the video. Again, normally you would do this when uploading the video in the first place.
Click on the “Upload Thumbnail” area to load the image from your hard drive (something like 2021-05-22Thumb.PNG). You will see the new thumbnail in the first box.
You can change other information here as well, of course.
Click Save to apply the changes.
The updated thumbnail now appears for our video.